前言:
Unrealserver(虚幻)你们不知道了解不了解,如果不了解我也不告诉你
独服一般都安装虚拟化来充分发挥它的价值,当然单个ip的独服也是有价值的,我们可以以nat端口的形式让小鸡连接外网,并且ipv6不值钱,上万个ip可以自由分配,但是手动分配确实有点头疼,但也不是绝对,本文介绍如何自动获取ipv6与NATv4的小技巧
安装PVE
安装PVE这里省略,(因为我懒还没写)
配置网卡
- 编辑 /etc/network/interfaces
 1
 2
 3
 4
 5
 6
 7
 8
 9
10
11
12
13
14
15
16
17
18
19
20
21
22
23
24
25
26
|
auto lo
iface lo inet loopback

auto enp2s0f0  //网卡名称
iface enp2s0f0 inet static
     address 66.181.XX.188/32  // ip
     gateway 100.64.39.xx    //网关
iface enp2s0f0 inet6 static
     address 2604:abc0:1234:XX::2/128
     gateway 2604:abc0:xxx:79::1

iface enp2s0f1 inet manual

auto vmbr0
iface vmbr0 inet static
     address 192.168.0.1/24
     bridge_ports none
     bridge_stp off
     bridge_fd 0
     post-up   /usr/sbin/iptables -t nat -A POSTROUTING -s '192.168.0.1/24' -o enp2s0f0 -j MASQUERADE
     post-down /usr/sbin/iptables -t nat -D POSTROUTING -s '192.168.0.1/24' -o enp2s0f0 -j MASQUERADE
     post-up   /usr/sbin/iptables -t raw -I PREROUTING -i fwbr+ -j CT --zone 1
     post-down /usr/sbin/iptables -t raw -D PREROUTING -i fwbr+ -j CT --zone 1

iface vmbr0 inet6 static
     address 2604:abc0:1234:xx::3/64
|
配置TCP
找到编辑 etc/sysctl.conf
 1
 2
 3
 4
 5
 6
 7
 8
 9
10
11
12
13
14
15
16
17
18
19
20
|
net.ipv4.tcp_congestion_control=bbr
net.core.default_qdisc=fq
net.ipv4.conf.all.rp_filter=1
net.ipv4.icmp_echo_ignore_broadcasts=1
net.ipv4.conf.default.forwarding=1
net.ipv4.conf.default.proxy_arp = 0
net.ipv4.ip_forward=1
kernel.sysrq = 1
net.ipv4.conf.default.send_redirects = 1
net.ipv4.conf.all.send_redirects = 0

net.ipv4.ip_forward=1
net.ipv6.conf.all.accept_dad = 1
net.ipv6.conf.all.accept_ra = 0
net.ipv6.conf.all.accept_redirects = 1
net.ipv6.conf.all.accept_source_route = 0
net.ipv6.conf.all.autoconf = 0
net.ipv6.conf.all.disable_ipv6 = 0
net.ipv6.conf.all.forwarding=1
net.ipv6.conf.all.proxy_ndp=1
|
配置HDCP V4
1
2
3
4
5
6
7
8
|
#安装hdcp
apt install isc-dhcp-server
#启动查看状态
systemctl status isc-dhcp-server
#重启hdcp
service isc-dhcp-server restart
#开机启动
systemctl enable isc-dhcp-server
|
- 找到并编辑 /etc/default/isc-dhcp-server
1
2
|
INTERFACESv4="vmbr0"  //网卡
#INTERFACESv6=""
|
- 找到打开 /etc/dhcp/dhcpd.conf
1
2
3
4
5
6
|
subnet 192.168.0.0 netmask 255.255.255.0 {
option routers 192.168.0.1;
option subnet-mask 255.255.255.0;
option domain-name-servers 8.8.8.8;
range 192.168.0.2 192.168.0.100;
}
|
配置HDCP v6
1
2
3
4
|
apt install radvd   #安装radvd
service radvd restart  #重启radvd
status radvd     #启动radvd
systemctl enable radvd   #开机启动
|
 1
 2
 3
 4
 5
 6
 7
 8
 9
10
11
12
|
interface vmbr0
{
        AdvSendAdvert on;
        MinRtrAdvInterval 30;
        MaxRtrAdvInterval 100;
        prefix 2604:abc0:1234:79::/64
        {
                AdvOnLink on;
                AdvAutonomous on;
                AdvRouterAddr on;
        };
};
|
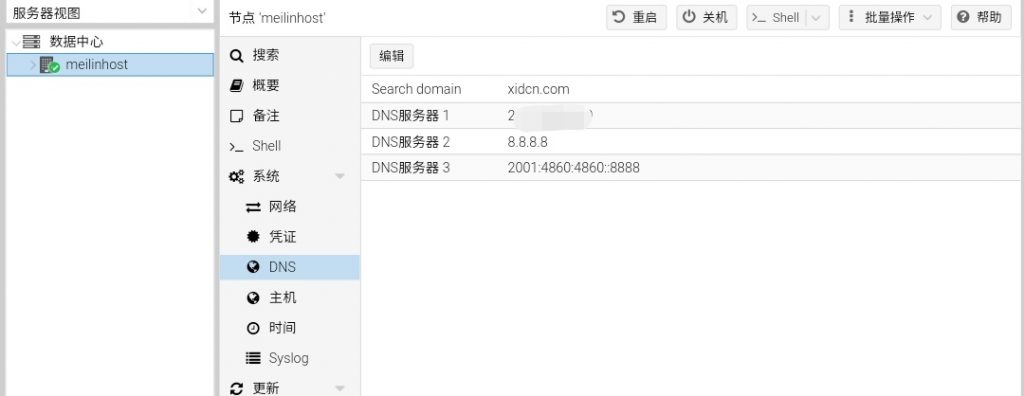
设置V6 DNS
重要提醒
虚幻的母鸡没有ipmi,所以在你操作的时候可能需要设置个定时恢复自救
1
|
cp /etc/network/interfaces /root/interfaces
|
1
2
3
|
SHELL=/bin/sh
PATH=/usr/local/sbin:/usr/local/bin:/sbin:/bin:/usr/sbin:/usr/bin
0 */1 * * *     root cp /root/interfaces /etc/network/interfaces;reboot
|
1
2
3
4
5
6
7
8
9
|
/etc/init.d/cron status  #查看状态
/etc/init.d/cron start   #启动
/etc/init.d/cron restart #重启

service cron status #查看服务状态
service cron start #启动服务
service cron stop #关闭服务
service cron restart #重启服务
service cron reload #重新载入配置
|


 支付宝
支付宝
 微信
微信